Nuffnang Code

Showing posts with label make up. Show all posts

Saturday, July 12, 2014

Cover Girl and Olay Tone Rehab 2 in 1 Foundation Base

Because I'm such a lucky girl, with a generous sister-in-law, I got to try Cover Girl and Olay Tone Rehab 2 in 1 Foundation Base for 2 weeks already. I owe it also to my skin tone and her skin tone because she bought the medium tone but it sadly it didn't fit her so she gave it to me. *dances giddily*

Okay, so I was kind of hesitant at first because I thought it would not fit my skin tone as well cause I'm a lot darker than her. Surprisingly though, the foundation really blended in my skin so I gave it a try for 2 weeks and it has not failed me.


What is Cover Girl + Olay Foundation Tone Rehab 2 in 1 Foundation base?

It's a combination of foundation and hydrating serum to cover fine lines and wrinkles and help improve skin tone over time. It also reduces the look of skin discolorations.

My thoughts on Cover Girl + Olay Tone Rehab 2 in 1 Foundation Base


The bottle given to me didn't have the cap cover anymore but it has a purple cover if you buy it in stores.:)

Swatch of #140 Natural Beige

Before and after. Left without make up and right with Cover Girl + Olay Foundation


After 6 hours in the mall without retouch.

I LOVE...

The Scent: It smells fresh and clean and the Olay smell is very distinct with the product. I like that it smell fresh and clean because I feel that the product is safe for my skin.

The Coverage: I like that it blends really well with my skin tone and it covers my skin discoloration. One of my main problem is that my forehead is darker than the rest of my face. Sometimes I would need to use a lighter shade of foundation just so it would have the same color with my face. With this foundation it helped blend out the color on my forehead and face. It also managed to cover the black circles on my eyes so I did not really use a concealer anymore.

The Longevity: As a teacher I can't always retouch after class because I only have ten minutes each class. I also only have a lunch break and sometimes I could not retouch the foundation anymore. Another problem I have with foundations is its staying power in a hot weather like ours in the Philippines. I travel to school using public transportation and I also transfer from one campus to the other making me and my make up exposed to the sun and sweat. But Cover Girl + Olay, amazingly, can keep up with my lifestyle and the weather as well. I do not retouch too often but it still makes my skin flawless. I even used it while in a make up prenup gig from 9am to 6pm and it didn't wear off. Cool, right? I guess this one's really a keeper for me.

The Packaging: I love the packaging. It looks like chocolate inside a tube with the white and brown combination on it. I also love the light purple color of it. The pump up bottle makes it less messier as well when using. I also like that I can see through the bottle and know how much of the product I have been using already.

I Don't Like... well,nothing really! I love the product and I would definitely buy one as soon as I'm finished with this one.

My Final Verdict: This is my first Cover Girl + Olay make up product and I'm satisfied with the effect it had on my skin. I love everything about it and I'm looking forward to try other products from their line too.

For more information you can check their official site here: www.covergirl.com
Like them on facebook: www.facebook.com/COVERGIRLPH
They can also be found in make up section of different department stores.

Have you tried any Cover Girl product? Please share with me your favorite product so I can try them as well. :)

*Not a sponsored post. :)


Friday, July 26, 2013

FACE TALK: AVON Beauty Blogger Challenge

A friend posted me this Blogger challenge from AVON yesterday, but I was a bit hesitant to join as I just started blogging about make up and make up tutorials this month. But after thinking about it I said, "What the heck, might as well give it a try." I'm sure a lot of bloggers will be joining and it wouldn't hurt if i entered the contest myself, who knows I just might get lucky!:)

My official entry to AVON's Blogger Challenge

For other beuaty bloggers out there, try your luck too and enter the contest. It's very easy, you just have to post links of your make up tutorials with or without AVON products. (But I think it's better if you have used their products) After completing the online form, they'll give you a voucher just like the picture above and you just have to wait if you'll get chosen.

Here is the mechanics for the challenge:


For more details click here: AVON Beauty Blogger Challenge How To


Monday, July 15, 2013

FACE TALK: Cheap and Easy Way to Organize your Make Ups


Well. today's your lucky day. I'll share my budget friendly way of organizing your stuff so whatever you put on your face will be kept clean and organized. 

I used a three layer plastic container to put my stuff. I couldn't afford a make up traincase now so I make use of what I can at a cheap price. So I headed to Japan Home, one of my favorite stores, where you can buy lots of practical, functional and weird stuff. So here's what I bought and it only costs Php 88.00. 

I don't really have a lot of make up stuff because I have a weird habit of finishing a product before buying a new one. I only buy what I need, so if I have stuff that are more than one it's usually a gift to me. So at least I still get to save and have a stash with me:) So this Japan Home 3-layer plastic organizer is just right for my needs. 

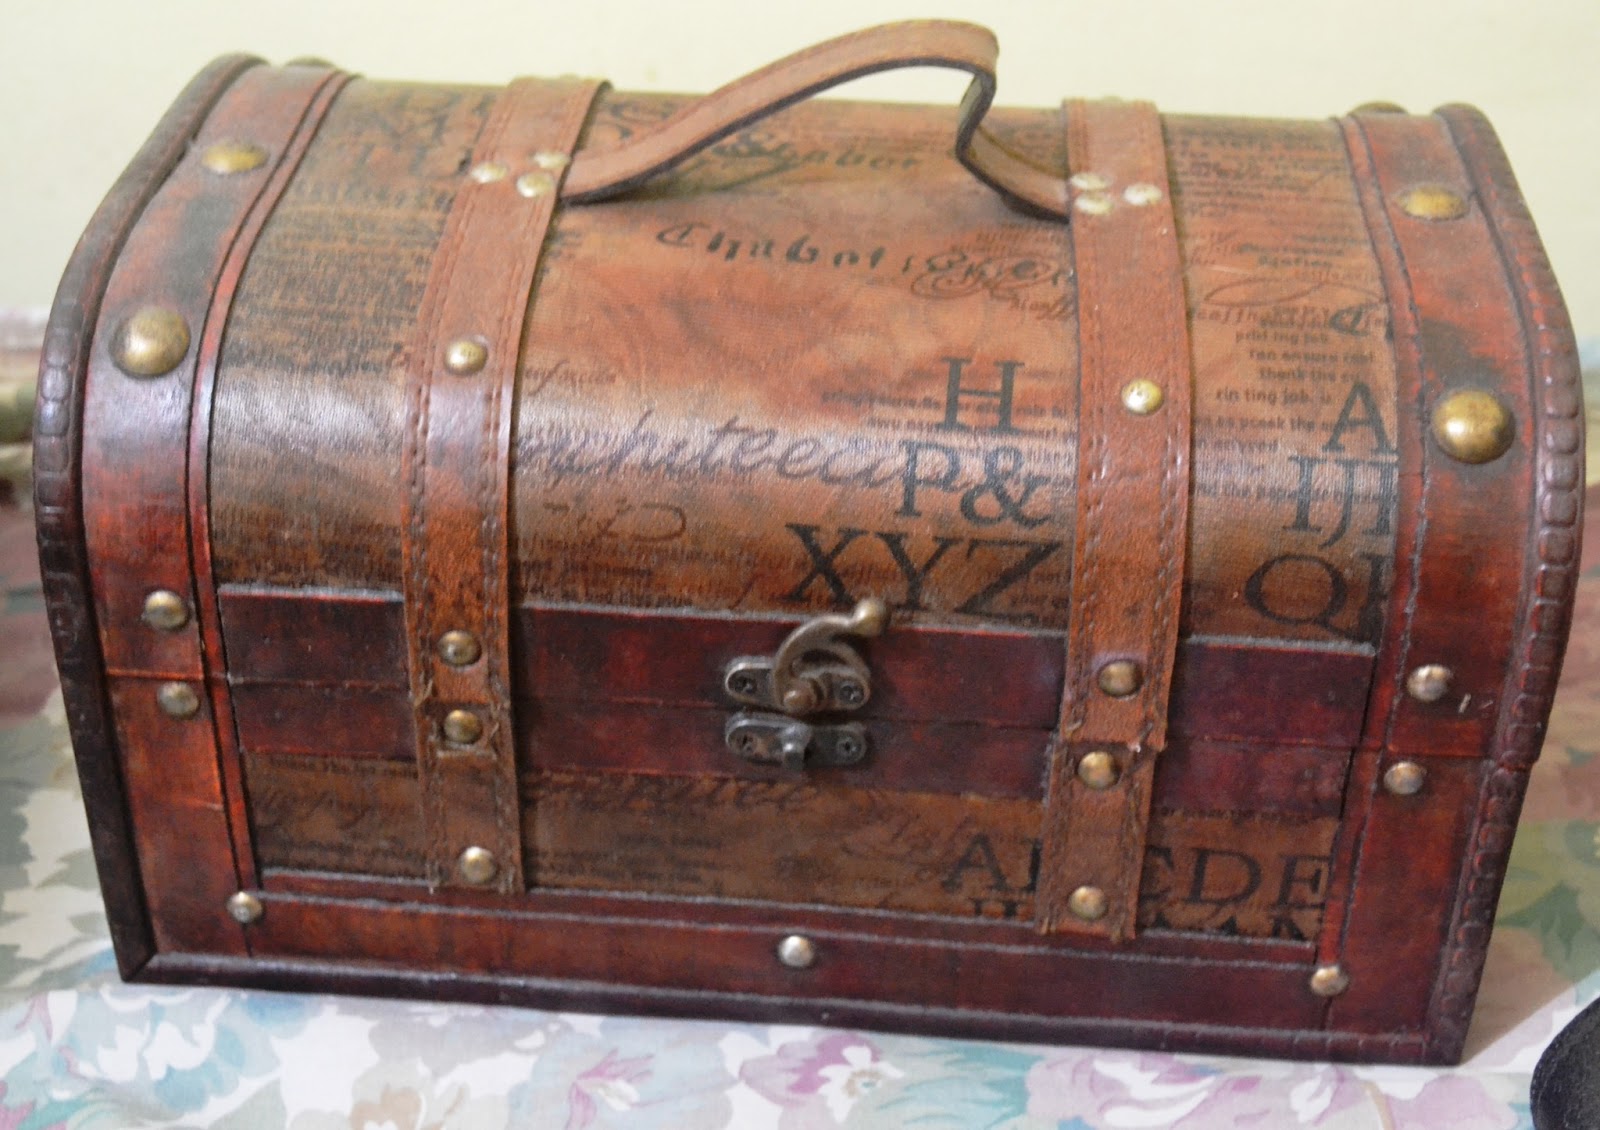
This is the result!:) I labeled each layer with eyes, lips, and face. It's not only good to look at, it also makes applying make up more efficient because I instantly know where to get my stuff. For the bigger stuff like my make up brushes, loose powder, make up remover, etc. I have another treasure chest to put it in. When I say treasure chest, it literally means a treasure chest. 

I got this treasure chest in Dapitan Arcade. It's near Mayon Ave in Manila. It only cost Php500. It's a little pricey but a lot cheaper when you buy it in the malls. So it is still a cheap find for me. Here's a before and after shot of my stuff inside the treasure chest.

So ladies, whatever organizer boxes, treasure chests, or make up train cases you have for organizing your make up, it's important to keep it always clean and hygienic. It also does not need to be expensive to organize your stuff all it needs is practicality and discipline to stick to your system. 

I hope you could also share your organizing tips with me!!:)
TTFN!


FACE TALK: Every Girl's 5 Basic Make Up Brushes Must Have

Here's my take on the 5 Basic Make up Brushes every girl must have in their make up kits. A big factor of how the make up looks on your face is the brushes that you use. Using the correct brushes helps you create the look you want with more efficiency and accuracy. All make up brushes have their specific task and functions and it's very basic that girls who wear make up know these.

So what are the five basic brushes?


First, a blush brush. A blush brush is round and you use it to apply blush on your cheekbones.  Aside from its use as a blush powder you can also use it as your powder blush to retouch your make up when needed.


Second, two sets of angled brush for eye shadow. One for a lighter shade and the other for the darker shade. An angled brush is used for the eye to help you have better coverage when applying your eye shadows.


Thirdly, you need an eyebrow brush. The eyebrows actually frames the face so it is one of the most important part of your face that needs make up. An eyebrow brush is used when you are not using an eyebrow pencil. Just make sure to apply the color by a very light and soft strokes so it would look natural. After applying, swipe your finger on your eyebrow to remove excess make up on it.


Lastly, a lipstick brush. I like to use a brush in applying my lipstick because it helps absorb it better and it also covers more evenly than directly putting on the lipstick. It also prevents overlaps when you use it.


These are the five basic make up brushes that one must have if you want to practice your make up skills. You can add in more brushes as soon as you understand the use of these five basic brushes. It's a lot more practical to have a basic set that you can use frequently that have a whole set without knowing its use.

I'll try to post some other types of make up brushes that I have and read. BTW, these are all my everyday make up brushes and I got it from Paganini collection at Landmark in Trinoma. What's good about the brushes is that it is small and compact. Plus the hair on the brush is really soft. So if you're on a budget, try these brand of make up brushes then switch to a more high end brush once you're ready to advance your skills. Enjoy practicing!! TTFN!!

The Five Basic Make Up Brushes Every Girl Must Have

Wednesday, July 10, 2013

FACE TALK: Green and Purple with Envy

I got the chance to be a HMUA for my sister-in-law in a wedding she attended last year. She wore a beige empire cut gown so we decided that we can have a colored eye shadow on her so it would contrast her neutral shade gown. 

I love green shades of eye shadow but i mixed it up with her favorite color which is purple. 
I also contoured her nose a little because it was her request.:) I'm not really good at contouring yet but I think I'm getting the hang of it already.

I'll share the step-by-step process I did with her whole look. 
Her complete look.:)

STUFF I USED:
Foundation
Fashion 21 Natural loose powder
concealer
ELF 100 eyeshadow pallette
in2it eyebrow kit
Clear mascara
ELF contouring and blush duo
false eyleashes
liquid eyeliner
blush on
lipstick
brown mascara
(I don't remember what brands I used for some because she had her own set to match her complexion etc.)


MAKE UP HOW TO:

1. Start with a clean face. Wash, tone, and moisturize.
2. Using a stipple brush, apply your foundation all over the face.
3. With your powder brush, dab loose powder all over the face.
4. With your forefinger, conceal any skin blemishes you may find. Dab with powder.
5. Before putting on the eyebrow powder, make sure that the eyebrows are properly groomed.
6. Dip your eyebrow brush in water, blend in with your choice of eyebrow color and test it in your hands before applying on the eyebrow.
7. Apply clear mascara to help it stay in place.
8. Apply eyelid primer on the eyes, dab with your base color eye shadow.
9. Put loose powder on the under eyes.
10. Apply blue shadow all over the crease.
11. On the outer corner of the eye, apply purple eye shadow making a triangle form of it.
12. Blend the two colors so the division will not be visible.
13. Put in your sized false eyelashes.
14. Draw your liquid eyeliner. Let it dry.
15. After drying, apply powder eyeliner to keep the liquid eyeliner from smudging.
16. Softly draw eyeliner on the lower eyelids.
17. Brush off loose powder.
18. Using a blush brush, apply blush on .
19. Apply lipstick and gloss.
20. Using a fan brush, remove excess make up all over the face. 

Closer up of her make up look
 *Note: To contour the nose, I made use of eye shadow. 1 lighter shade than her complexion and the other a little darker for her complexion. Apply the light colored on the bridge of the nose extending it on top of the eyebrows. For the darker color apply it on the sides of the nose and blend well. The shape of the nose depends on the color you put. Remember, light colors highlight, while dark colors contour. 

Without flash.

With flash.
Colored eyeshadow gives emphasis on the eyes but always make sure to only choose one part on your face. You don't want to look like a clown right? So balance everything. If you have colored eye shadow, go for a light lipstick. If you're going for a dark lipstick, get a neutral eyes. 

But whatever works for you, you need to have confidence.:)
Enjoy, ladies.
TTFN!!!

Monday, February 27, 2012

FACE TALK: The Primer/No Makeup Makeup Look

I did a primer make up look last Friday, and I thought its one of those looks worth posting to show my make up learning from all the workshop and readings Ive been doing for the past months. Im no Pro in make ups but I really enjoying putting it on and trying it out on some of my friends, (when I mean some, I mean just one person).

So here goes, my first primer/no make up make up look: 
What I used: 
1. Facial Cleanser: I used NIVEA White
2. Tone: Im a fan of Nivea so, I use the same brand
3. Liquid Foundation: Ever Bilena Oriental. For everyday use I prefer this brand as its inexpensive and covers really well. I usually use my fingers to blend it in but realized a triangle sponge could also do the trick. Remember to always wash your hands and make up applicators to avoid having pimples.
3. Loose powder: Fashion 21 Natural. With a powder brush, dusk excess powder first and use it all over the face. It seals the foundation which makes it oil and shine free. 
4. Eyebrow: In2it eyebrow kit, medium brown.The eyebrows shape your face, and its very crucial that you keep it clean and with color. Its the easiest way to look young. You dont want to look like Mona Lisa, right?
5. Eyeshadow: Avon Neutral Shade. I am a fan of the brown shades as it is very easy to match with any color of attire and its the best color to look natural. I did the 3 color shadow technique with a little contour on the eye.
6. Eyeliner: 711 eyeliner. (yes, 711 offers different cool and cheap make ups) Make sure that you apply it really near the eyelashes. After, its good to apply a powder shadow on it to keep it from smudging. I dont usually put eyeliner on the lower eyelids cause its really hot here in the Philippines so it smudges. (Ill try to learn how to be able to smudge proof it.)
7. Blush on. Avon cheek tint. I put on a very light blush so I would still have a tint of blush but does not overpower the primer look.
8. Lipstick: Careline. I use my fingers to dab on my lipstick so it would look natural. I also tap it with loose powder, (very lightly) to keep it stick.
9. Bring in the CONFIDENCE. The confidence makes any make up look stunning, well, some of it!:) 
10. I didnt put mascara as I dont have it with me during that time:)


LinkWithin

Related Posts Plugin for WordPress, Blogger...
Lazada Indonesia